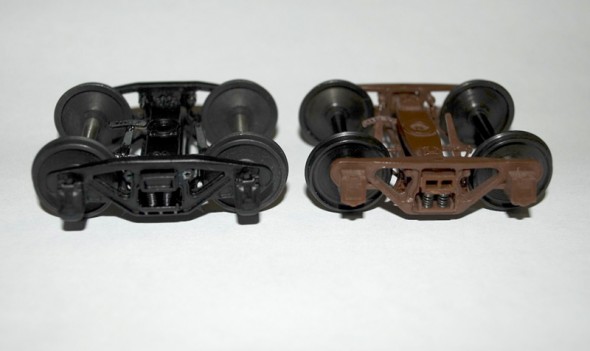
Vulcan Trucks – Two Different Versions

Yoder P48 Vulcan truck on left, San Juan P48 Vulcan truck with Protocraft 33″ wheelset on right.

While at the Strasburg show I picked up a pair of the new Yoder Vulcan p48 trucks.  The Yoder website shows the trucks are out of stock in P48, but he had some on the table at the show. The trucks come fully assembled and include a screw so that they could be mounted onto one of Rich’s models.

I had held back before on buying these because I have several pair of San Juan’s Vulcan truck on the shelf and really did not know much about the design. When I got home and set the truck next to a San Juan truck, I was pleased to see that they were different. This started a little digging to find out some more information about the trucks.

I looked at the article “Arch Bars to Roller Bearing, Freight car trucks 1900-1960″ by Richard Hendrickson in Volume 4 of the Railway Prototype Cyclopedia. Where I found out the Vulcan truck was manufactured by American Steel Foundries in the early 1920′s. They were similiar to Andrews trucks of the time, with a cast steel side frame with seperate journal boxes.  Where they differed is that the Vulcan design eliminated the need for a bottom retainer bars by bolting the journal box into pedestal jaws.

The article show photos of two different Vulcan designs one an earlier L-section and one a later U-section side frame castings.

In Robert Karig’s book, Coal Cars the first three hundred years, he speaks of the Vulcan design in chapter six on Freight car trucks. “George G. Floyd was awarded a patent for a side frame with pedestal mounted journal boxes on May 3, 1910. It served as the foundation patent for the American Steel Foundries’ Vulcan side frame. Initially built in a T-Section form, the Vulcan frame was ultimately converted to a channel-section design.”

I was also surprised to see that Rich’s trucks were completly within NMRA spec for P48. Not all of the trucks I have measured before from Rich for Standard O scale were, so this was great news. The San Juan truck does have nice casting letting on the truck sideframes that the Yoder’s are lacking.
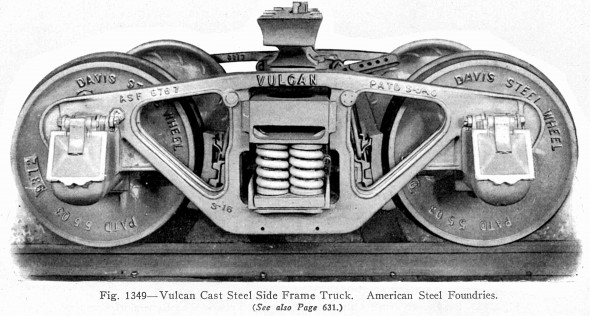
Vulcan Truck from 1922 Car Builders Cyclopedia
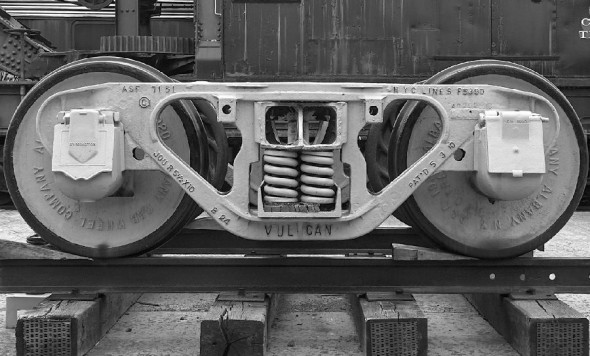
Vulcan truck with NYC markings on display at the Danbury Railroad Museum, Danbury, CT.
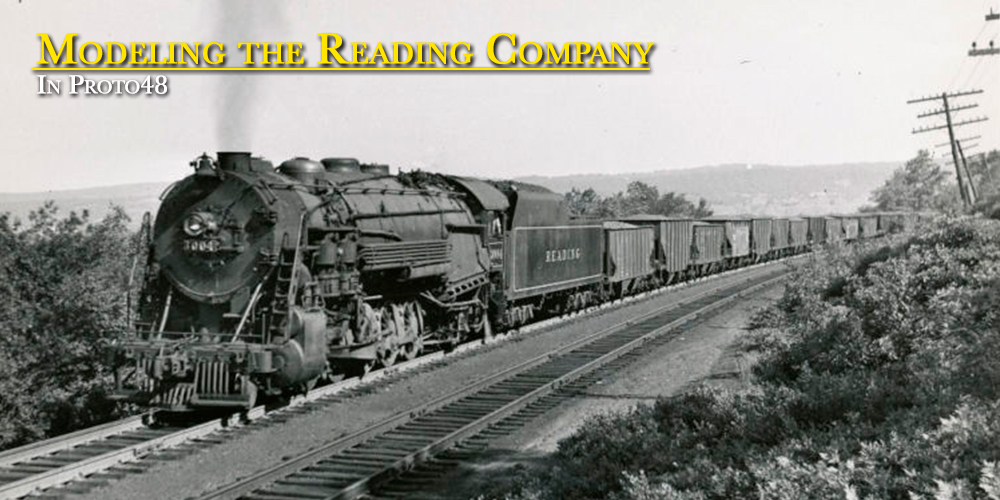
2011 Strasburg O Scale Show – August

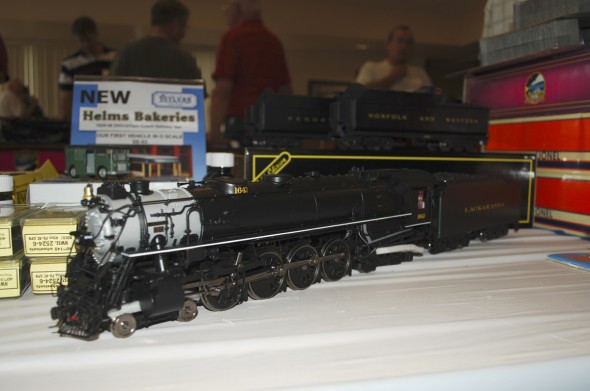
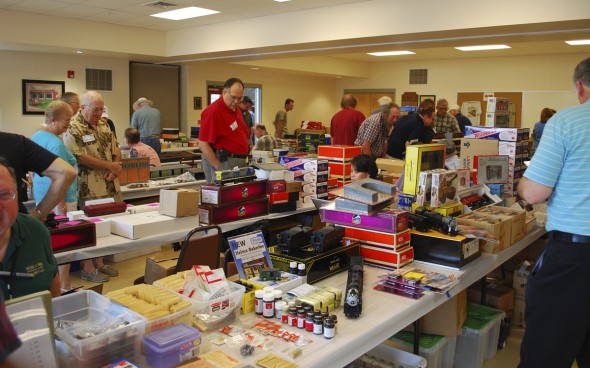
Rich Yoder and John Dunn put on another O Scale Show in Strasburg on August 6, 2011. The show was very well attended and there were a number of new things to see at the show. One of the bigger items that was on a couple of tables was Weaver’s new Lackawanna Pocono 4-8-4, one of them is in the lead photo on theis post.

Rich Yoder also had his new Mathieson Dry Ice car.  I didn’t photograph the car because I was to busy going through his stock of trucks. One his table he had O scale and P48 versions of two new trucks, the PRR 2F-F2 and the PRR 2D-F12. I’ve added the measurements for the new trucks into the P48 Wheel Standards page.

I was also able to pick up an older Precision Scale Co. C&O 50 ton twin class H5 with flat ends. We had been talking about this car on the Proto48 modelers board. Turns out this car is correct for one order of theErieoffset twins and is different than the Yoder cars that are correct for theErie. I’ll post more on that later this week.

I had the chance to meet and talk for a while to Jack Hill at the show. It was very nice to put a face with the models that I’ve seen in his blog.

After a nice morning of buying and selling, I had the pleasure of going to lunch at Jenny’s Diner on US 30 with other p48′ers, such as Martin Latowsky. That is starting to turn into a regular P48 Lunch outing.

Reading Modeling Myth #1-Will the “Real” RDG Pullman Green Please Stand Up – Part III

The plot thickens……

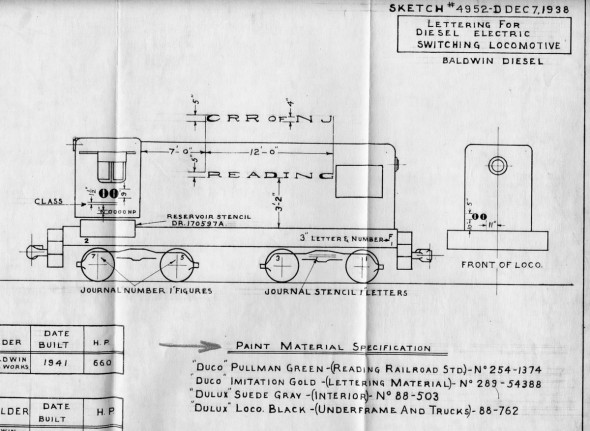
My brother Bobb sent this partial scan to tease me a little today. It’s from a lettering diagram for Reading and CNJ switchers. The drawing was first released on 12/7/38 and is updated through 1944.

It does identify “Duco Pullman Green -(Reading Railroad Standard)- No. 254-1374″

Now to research the modern version of that paint. Still might not be what’s on the AS-16′s, but it’s another step closer.

NYC Modeler Magazine is Launched

I received an email today that NYC Modeler online magazine was launched today. I’m looking forward to more information about one of the Reading’s major interchange partners and their equipment.

This type of online publications talks mostly about HO and N scale models, but the prototype information that goes along with the model information, is the same for all scales.

The first issue looks good, I wish them lots of success.

“Developed and edited by members and friends of the New York Central System Historical Society, we are providing this free resource for anyone interested in creating acurrate models of New York Central railroad equipment and structures. The magazine is only available as a PDF file.”

The Website is at http://nycshs.org/nycentral_modeler.php

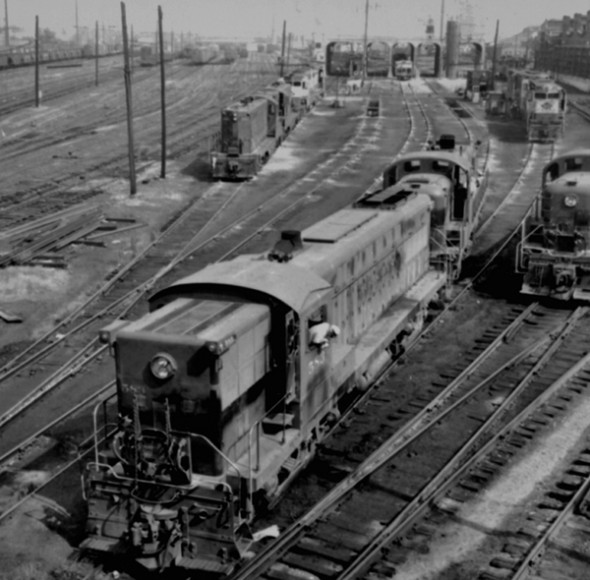
Prototype: Reading RS-2 #583 Philadelphia, PA

One of the models on the progect list is the Baldwin AS-16’s with dynamic brakes.

Information on the short hood has been hard to come by. They spent most of their lives working were few photographers went. Also they were often MU’ed with short hoods together. He is a negative of Reading 583 later in life, looks like mid 60’s based on the green and yellow locomotive in the background.

While this isn’t the sharpest image in the world, it is another piece in the puzzle.

Multiple-Era Disorder

I saw this phrase posted on one of the boards today. A little voice rang out, “Yeah! I’m not alone!”

“Multiple-Era Disorder” can turn the average prototype modeler into a train collector quicker than anything else I can think of. You know the type with more boxes on the shelf than finished models on the layout. Life is way too short to waste time on modeling everything. I can only hope I have enough modeling time to build all the models I want for my ONE modeling period.

Discipline will set you free…

We all have friends go on and on about their new steam locomotive they just bought that was retired by 1948. Yet we know full well, he also has a set of diesels that didn’t hit the rails until 1972.  Are you looking forward to seeing them run together?  That works for them, that’s great, it’s just not my thing.

I don’t mean to pick on any one person about this, I used to be tempted by the newest releases of models outside of my modeling period. I’ve got a whole For Sale page on this site where I’m still trying to get rid of my models outside of my current modeling focus. So, I’ve suffered from this also, I’ve felt the pain.

It’s one thing if your models are meant for a display shelf, I just don’t have enough time or money to model in all the different eras.

I never said I don’t like the different eras. I just don’t have time to model them all!

Wheel Standards – part 2

Back in the Wheel Standards post, I started to take a look at how wide some of the currently produced O scale wheels are. What followed was the page NMRA S-4.2 O Scale Wheels Standards where I started to document how far from standard our wheels are. What I found was very disappointing, almost none of the products that were available were within the NMRA standard for wheels.

That opens a big question mark for me. I believe in standards, they are what will make the railroad run smoothly. What I was seeing was nothing close to standard.

On the ride back from Chicago I was able to have a long conversation with Matt Forsyth who was really stuck in the Jeep listening to me. He had been prodding me for a couple of months to thin down my standards, go to .135 wheel widths only to find out that the NMRA already went to .145. Here is an example of one of Matt’s Intermountain trucks with the thinned down .135 wheelsets.

Well as the conversation turned, I asked “you’re only .020 off of P48 widths, why not go back to p48 standards?” That lead to a long conversation about what’s important to each of us as modelers and what wasn’t. At the end of the conversation we were looking at trying proto48 standards with a 5 foot gauge. We each had our reasons for not just saying yes to Proto48 again.

We ordered in some wheelsets from Protocraft, boy did they look great! Matt quickly modified a set of wheelsets with a spacer installed behind the wheels to adjust the guage. The concept could work nicely. But is this the right direction? I stayed back on the fence a little, still not sure I wanted to commit to the concept. All the while those wheelsets kept sitting on the workbench screaming at me.

The data about the lack of standards for O scale kept piling up this Spring, some manufacturers had different tolerances on different runs of the same products.

When I made the choice to stop modeling in Proto48 back around 2000, I was headed in a different direction. I was a member of a club that really did not want proto48 in it, I had an ever increasing Steam Locomotive stable and didn’t have any real machining skills and there were not many products available for Proto48.

What I now realize, if you want standards, everything is a project to convert no matter what the gauge. If I used the new NMRA standard almost everything needs to be converted, if I go to proto48 standards, everything needs to be converted. On some projects in the queue to be built, it is actually more work to use the NMRA Standards than the p48 standards, mostly because of the products produced by Protocraft.

In this photo is a San Juan P48 USRA Andrews truck with San Juan plastic wheelsets, a San Juan truck with Protocraft wheelsets, and on the car another San Juan truck with PSC wheelsets. There is a difference. Here is a close up of the San Juan USRA Andrews truck with a Protocraft wheelset on the left and a PSC wheelset on the right.

Track Details in Shamokin Yard

How many times have we heard, “Don’t forget track is a model too?” So as I was walking through what was left of the yard in Shamokin, PA the other day, I took notice of some of the track details. Some of what I saw contradicted what all the experts tell us to do.

We all have been told “the prototype NEVER lines up rail joint bars across the two rails.” They should be staggered. Well look at the above image on the far track.

Also the standard drawings I’ve seen clearly show that the joint bars should be set over two cross ties. Look at both the near rail and the far rail, both only are resting on just one cross tie.

We have also been told to keep the turnout throws on the outside of a pair of tracks or crossover. Look closely, both of the turnout in what was this crossover they are on the inside of the crossover.

Something seems to be missing, and again notice that the throw mechanism is between the two tracks….

You are supposed to lay your rail straight and avoid short kinks.

Also check out the siding on the left, the track ends with no bumpers, wheel stops, not even a pair of ties laid on top of the rails….. can’t do that, right?

All kidding aside, this was the track condition in what track was left of Shamokin yard. The last photo shows a heat kink that has thrown the main out of gauge. The left hand track is the old North bound main, a cross over is just on the other side of the bridge at the end of the yard. The turnouts in the photos are at the Southern end of the passing track in town.

In this current condition you could not get a train through the town on this day.

Filling in the Holes

The more research you do to “file in the holes” of what you know, the more questions it brings up. I was able to fill in a bunch of holes the other day with a trip to Shamokin.

I finally found out what kind of bridge was at the Southern end of the yard. I’ve been looking for photos and have not found any to date. It is a ballasted through concrete trough with steel girders under it. The adbuptments were poured concrete on top of stone foundations. It looked like the bridge had a built date of either 1948 or 1949 the diamond on the adbuptment was a little damaged.

Here are some detail images of the bridge.

Notice the yard lead starts just after the bridge, you can still see it in the ballast.