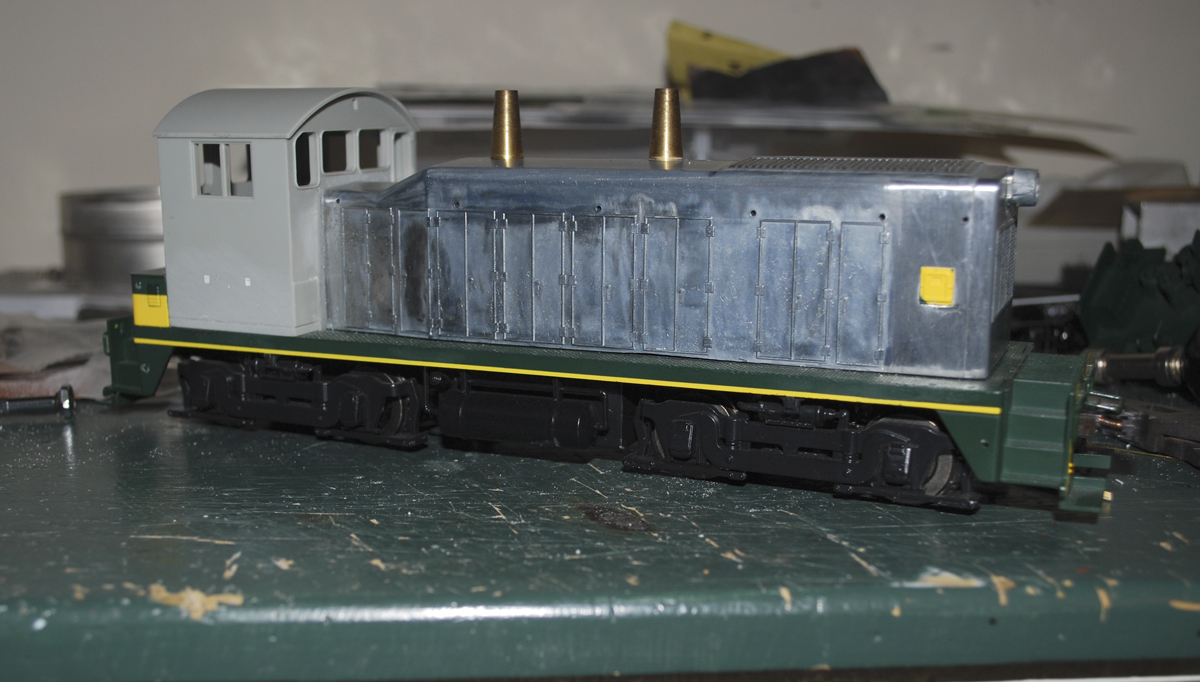
MTH SW-1 shell on an Atlas SW-8 frame
I bought this MTH SW-1 shell a couple of years ago. The SW-8 frame has the same wheel spacing as the SW-1 so I thought I could drop the shell on top of the frame. You pretty much can but there are a couple of other thing you need to do to finish up the model. The SW-1 frame top is a different pattern then the longer hood of the SW-8. Atlas did not continue the sapty tread pattern of the deck under the hoo or cab of their SW-8. WHy should they you would never see it. But when the shorter SW-1 hood was placed on top the difference is easy to spot. In the photo it shows up as the unpaited and untextured area in front and behind the shell.
This meant that a new frame deck was needed. I did that and I even cut it slightly wider then the frame deck to take care of the second visual difference in the frames. The SW-1 had a top lip to its frame, the side of the SW-8/9 has a smooth side.
If you have seen this site in the last year you would know that I have been going back and forth about how to model the Elmira branch of the PRR, include Williamsport or Southport wasusualy the hang up. Williamsport did not allow enough Reading to meet my need and Southport gave more interchange but none with the Reading. Anyway, I kept going back and forth about this unit and never finished the conversion because I would need the SW-1 and then the yard would change and I would need an SW-9. Since that is no longer the question and I do not need the SW-1 in this idea of the Shamokin division I decided the shell needed a new home which it now has.
BTW the SW-9 doesn’t fit in the new layout time period. So an All-Nation NW-2 shell is going on top of the Atlas frame. More on that to come.